Shadowsocks Client on Raspberry Pi OS
This post shows you how to install a Shadowsocks command-line client on Raspberry Pi OS (32-bit Debian 11).
Check that you have Shadowsocks in your Raspberry Pi’s repositories. Open a terminal emulator and issue the command:
apt-cache search shadowsocks
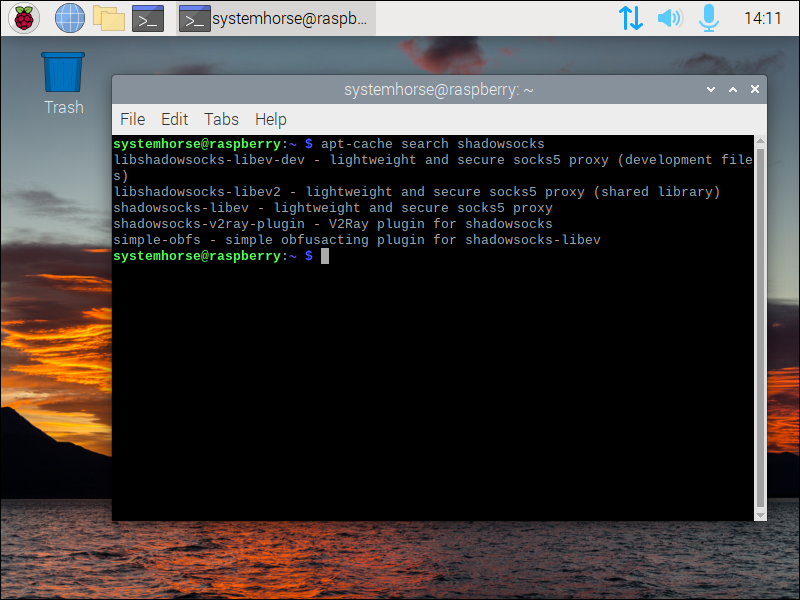
Assuming you see shadowsocks-libev, install it as follows:
sudo apt update && sudo apt upgrade -y
sudo apt install shadowsocks-libev -y
When you install the shadowsocks-libev package, it automatically creates a systemd service defined in /usr/lib/systemd/system/shadowsocks-libev.service and referring to the configuration file /etc/shadowsocks-libev/config.json.
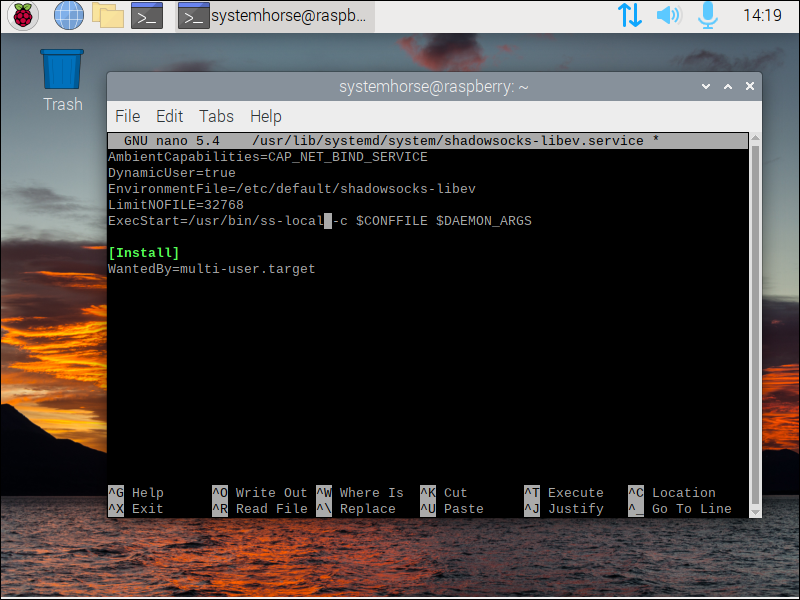
Edit /usr/lib/systemd/system/shadowsocks-libev.service using your favorite text editor, such as vi or nano. Remember that you’ll need to prefix your edit command with sudo to edit system files:
sudo nano /usr/lib/systemd/system/shadowsocks-libev.service
Change the systemd service file to invoke ss-local instead of ss-server:
ExecStart=/usr/bin/ss-local -c $CONFFILE $DAEMON_ARGS
Save the systemd service file. (You’ll reload systemd in a moment.)
Edit the configuration file /etc/shadowsocks-libev/config.json to match your server. Again, remember that you’ll need to prefix your edit command with sudo to edit system files:
sudo nano /etc/shadowsocks-libev/config.json
Insert contents modeled on the following, replacing 123.123.123.123 by your actual server IP address, and substituting in the actual port number and password for your Shadowsocks server:
{
  "server": "123.123.123.123",
  "server_port": 8388,
  "local_address": "127.0.0.1",
  "local_port": 1080,
  "password": "S2T5o0rS1ewcw3VcDdqMqmUlz3rfIekW",
  "method": "chacha20-ietf-poly1305",
  "timeout": 300,
  "fast_open": false
}
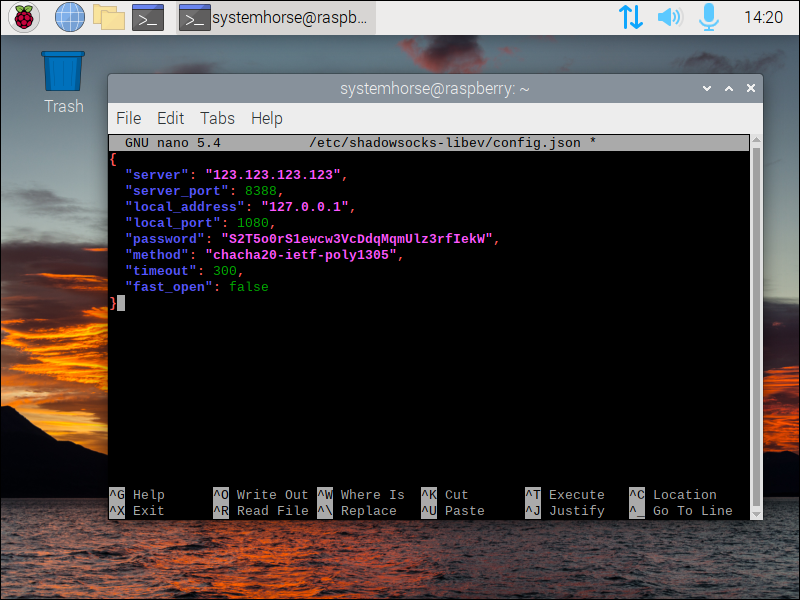
The parameters you choose on the client must match those on the server.
After you’ve finished editing, save the configuration file /etc/shadowsocks-libev/config.json.
Reload systemd:
sudo systemctl daemon-reload
Restart the Shadowsocks service:
sudo systemctl restart shadowsocks-libev
Check that shadowsocks-libev is running:
sudo systemctl status shadowsocks-libev
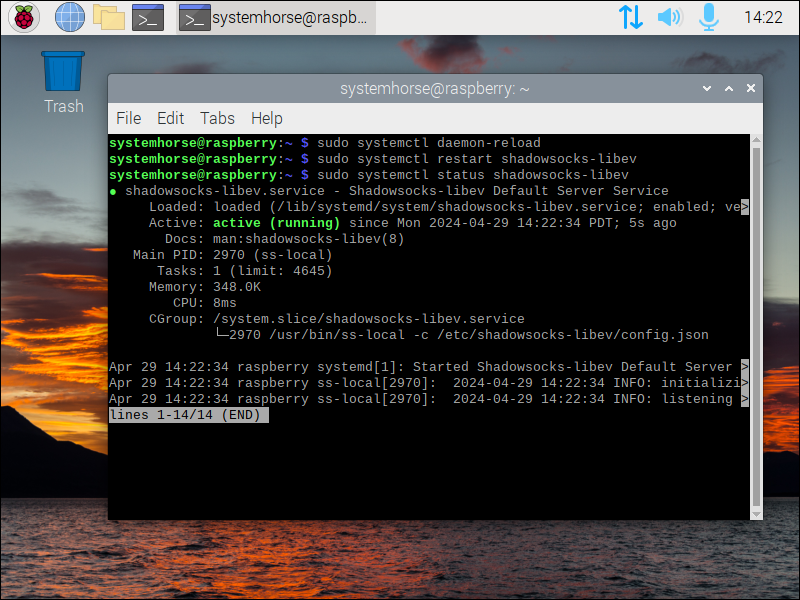
Do q on your computer keyboard to quit the status listing.
Now open Preferences > Add/Remove Software. Install Mozilla Firefox ESR.
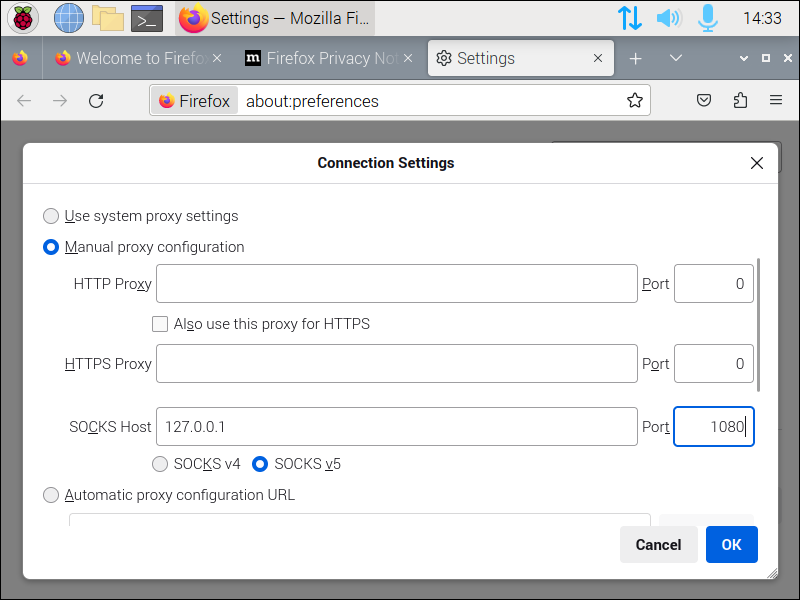
Open Firefox. Under the hamburger menu, go to Settings > Network Settings.
Set Manual proxy configuration, SOCKS Host 127.0.0.1, Port 1080, SOCKS v5, Proxy DNS when using SOCKS v5. Click OK.
Now browse the web using your Shadowsocks proxy server.
When you are done, set the network back to Use system proxy settings. You can leave the shadowsocks-libev service running in the background until you next need it.
(If you want to use Chromium instead of Firefox, it may be possible to add a line http_proxy=socks5h://127.0.0.1:1080 in the file /etc/environment. This has not been tested.)